One of the coolest things about pinhole photography – and honestly a key component that got me hooked – is the fact that you can build pinhole cameras yourself and out of anything that you can make light-tight!
Your imagination and craftsmanship are the only limits in this game!
There are already tons of links out there about how to build a pinhole camera. You can spend DAYS reading about how to build a pinhole camera. Believe me – I have. If you have a knack for DIY, figuring out how to blend multiple plans into a single Frankencamera is a lot of fun too!
It is not my intention to add to the piles of how-to articles. We’re going to add something different – this is going to be a Meta-How-To (yeah I just made that term up).
In this article I’m going to arm you with the info you need so that you can decide what type of camera to build.
Modifications, Freshly Built or Modifying an Existing Camera
Some plans require you build a camera body; while others have you repurpose an existing container. Depending on your tools, abilities, or available time one approach may be more appealing than the other. Let’s look at some options and considerations for each choice.
Building a container yourself
- At a minimum, you must be able to make the camera body light tight.
- If you’re going to use paper negatives, the film holder can be fairly simplistic.
- If you’re going to use roll film, consideration needs to be made for the winding mechanism (more on that below).
Using a prebuilt container
- Feel free to repurpose anything, an old tea tin, a ceramic tchotchke, an old shoe box…
- You’ll need to paint the interior to make it flat black (no reflections!)
- You can make a camera out of any oddball thing you find, making you the hippest kid on the block.
- The same considerations will still need to be made in regards to film holder mechanisms.
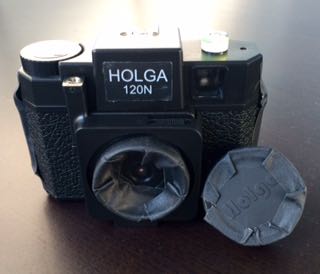
Modifying An Existing Camera
- My favorite option because part of my joy is to pull apart the camera to see how it worked.
- One advantage is that your film handling structure is already installed – for film this is a huge advantage
- Old cameras can be found in the attic or the antique store – often for under $10!
Paper vs Film vs Instant
On it’s surface, your choice of film or, more technically, sensitized material, seems simple. And it is simple! It is important, though, to choose a medium that you’ll enjoy. Choosing the right materials will increase your likelihood of enjoying this pinhole journey you’re embarking on.
Paper Negatives
- Can be used in many different cameras
- Needs to be processed at home
- Requires the tools, chemistry, and skills needed to develop photo paper
- Black and white only
How to use:
Paper negatives involve using black and white photographic paper in your camera as a negative. The paper is cut down to size and placed inside the camera body and used like you would film. Remember to keep the paper under safelight while you are doing the cutting and placing into your camera. We don’t want to ruin the paper before we expose it! After you expose the negative and develop it, you can either contact print it with another piece of photo paper or use a scanner to digitize and invert the photo on your computer. Paper negatives are the slowest film type, usually about 6 ISO, however they provide a great and unique image quality that you’ll get from nothing else!
Film
- Camera design needs to have considerations for film handling.
- Multitude of films to choose from: Eg. 35mm, 120 (medium format), or large format (such as 4”x5”)
- Can easily be sent to a lab for processing and scanning, or black and white can be processed at home
- Black and white or color
How to use:
When building a film fed pinhole camera, the important thing to consider is the winding mechanism. We’ll set aside the use of large format film for now because that’s very specialized. If you don’t have good structural support for the 35mm canister or 120 spool, you can run into binding issues making it difficult or impossible to wind the film. The film must have a sturdy holding mechanism and also a smooth method of winding the film without disturbing the light tightness of the camera body. If this makes you nervous, modifying an existing film camera might be more your speed until you have gotten more comfortable with your creations. 35mm and 120 are both roll format films – 35mm being the common canister you’ve often seen; and 120 being a larger film on a spool with paper backing. Both 35mm and 120 are fairly economical, with 35mm being the cheaper option. Both films can be sent to a number of labs around the country for processing and scanning before returning to you.
Instant Film (e.g. Polaroid):
- It’s easiest for processing so long as your camera must have proper roller system for it
- Want your photos now? This is super easy – snap in a pack, take the pic, rip the film out, and wait 60 seconds!
- Black and white or color
The right equipment is necessary. Don’t worry – finding it is not that hard. Hit the antique store and look for old Polaroid Land Cameras. When you find one, open the back and make sure the rollers are clean. Then Google the model number and see if it takes Polaroid 669 film. If it does, you’re in luck – Fuji’s got your film needs covered! All you have to do is remove the lens and put in a pinhole.
Other Considerations
Whatever your film choice, consideration must be given to how your camera will be used “in the field”. Are you ok with only changing the film or paper negative at home? Then little consideration is needed. However if you want to be able to change sheets of paper, rolls of film, or packs of instant film, some forethought is necessary for your design. All this means is – think about your camera design and what it will take to change the film. Is this a process you’re comfortable with doing in the field? Do you care?
Pinhole Sources
The traditional way to get yourself a pinhole is to literally take a tiny pin and slowly bore a pinhole into a piece of aluminum. Here’s a bunch of videos to help you with that. If you’re just toying around, this is a great way to get started.
When you get a little more serious, and want your pinholes to be more precise, you can get laser drilled pinholes to exact diameters. You can sometimes get these mounted onto a larger disc for easier handling, while others will just be a tiny piece of aluminum. There are lots of options for you to choose the type that suite your own needs.Here’s a Google to get you started.
You might be wondering what size pinhole you should use. Well, lucky for you, there’s a calculator for that! Just plug in your camera measurements and it’ll guide you towards the right size. Just note – laser cut pinholes are usually measured in microns, and 100 microns is a tenth of a mm (e.g. 100 microns = 0.1mm).
Random Features
There’s lots of room for creativity in your designs.
- Try a panoramic camera with a curved film plane to avoid distortion and vignetting over a long film plane.
- Integrate a film mask to get a super crisp edge or custom image markings
- Bullseye bubble levels for quick level reference
- Cable release adaptors are by no means a must-have, but sure can be nice in certain situations.
Questions?
I hope that I’ve helped you leap a few steps down the path to figuring out which plan works best for you. But, this is just one article, so I’m sure there’s other questions. Feel free to put them in the comments below and I’ll get to them soon!