Editor’s note: The daily pinhole photos are curated and shared to inspire and elevate the pinhole photography artform. Do you have a photo you’d like considered? Tell us about it.
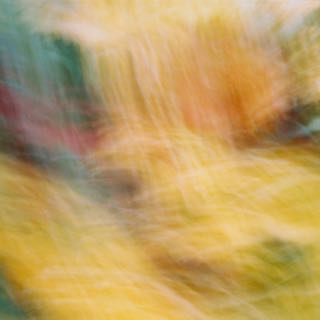
Today’s featured pinhole photo focuses on nothing, and therefore everything.
Hungarian photographer Thomas Fitt wielded his matchbox pinhole camera to make this excellent capture. By handholding and moving the camera over his wife’s flowers, he focused not on the flowers themselves, but on the emotion of the richness and color.
Editor’s note: The daily pinhole photos are curated and shared to inspire and elevate the pinhole photography artform. Do you have a photo you’d like considered? Tell us about it.
Today’s featured pinhole photo will bring out the kid in you.
To make this fun pinhole photo, Darren Constantino mounted his camera to a seesaw as his sister Sharon rode the other side. The result is a wonderful example of how the constraints of pinhole photography can drive us to dig deeper in our creative psyche.
To catch more of Darren’s work, check his Flickr page.
Pinhole cameras carry great variances with movement. Whether it is the camera moving or the world around the camera, only certain aspects will be picked up. It all depends on two things: the length of exposure time and the amount of movement that accrues before the photo is finished being exposed.
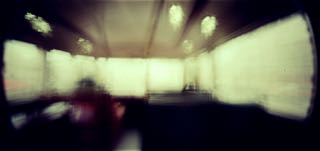
[singlepic id=175 w=300 float=right] [/singlepic]Tina Rowe’s photographs are a wonderful example of movement in pinhole photography. She began focusing on this aspect with a long exposure of a restaurant in Paris (photo right). “A 45 minute shot I had taken in a busy restaurant in Paris. Although people were blurred, they still stayed in their own little pools in the final image, the blurring increased the colour palette and I am pretty sure that there was some colour shift on the film from the long exposure.” This photo is where her path to experimentation with movement began.
[singlepic id=178 w=300 float=left] [/singlepic]As Tina’s experimentation grew, she found a love of movement on transportation. It started with a train ride on a rickety train in Brazil (photo left), when she took a couple of photos and came away “impressed with the way the long exposure, coupled with the movement, made the colours mix and accentuate each other while the length of the exposure meant that I ended up with an average of the forms being captured.” She had stumbled on something now – an abstraction that brought more detail of emotion than physical form.
The camera movement captures a bustling feeling. Tina brought home these lessons of energy and movement. During some forays into the heart of London, she applied her technique to the city buses, making exposures of 5 to 10 minutes as the buses rambled through town. With these handheld photos, She’s produced photographs that recreate the movement of both the bus and it’s rider. Her photographs are designed to take you on an unfamiliar ride in the seat of a bus.
Editor’s note: The daily pinhole photos are curated and shared to inspire and elevate the pinhole photography artform. Do you have a photo you’d like considered? Tell us about it.
Today’s featured pinhole photo is a gentle view on a sunny day.
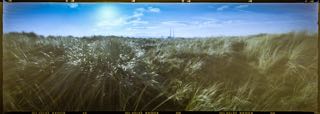
Using a Reality So Subtle wide angle camera pointed at the sun, Fran Morrin captured this warm scene on Bull Island. It’s an image that stirs memories of perfect summer days with nothing to worry about.
Artūras Meškauskas, a Lithuanian photographer from the city of Panevezys, made this wonderful image with his homemade pinhole camera that he fashioned from a Twinings Tea tin and expired Ektar 100. I’ve got to say his appears to be the best tea tin camera I’ve seen. This scene was captured in 2014 on an autumn holiday in Gran Canaria.
You can find more of Artūras’s work on Flickr and Facebook.
Paul Griffin made this image in the bottom of an abandoned swimming pool using his Eight Banners 6×9 loaded with Kodak Portra 160. As indicated by the title, he made this for WWPD. He made this image using what he refers to as “Photoshop in camera”: overlapping the 6×9 exposures as he moves through the 120 roll. This gives him a slight bit of unpredictability while also providing a fair bit of creative choice in which images to use.
You can find more of Paul’s work on his Flickr page.
Angel Rueda made this wonderful capture with his pinhole camera leveled into the sun and perfectly aligned with the symmetry of the scene. The effect is an almost overwhelming sense of light and warmth.
Many of us who’ve been around photography for much time at all have been introduced to the concept of the Golden Hour – that time just after sunrise and just before sunset. The light during this time can be truly amazing, and has served as the drama of numerous photos over the years.
The challenge for us pinholers though, is that our cameras often require a longer exposure during these times of day. Moreover, as the exposure time increases, the intensity of the sunlight can change rapidly, leading to complexities in our exposure. The effect can be compounding, especially on slower capture methods such as paper negatives.
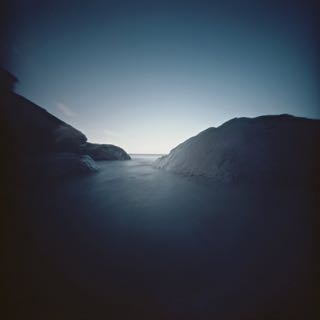
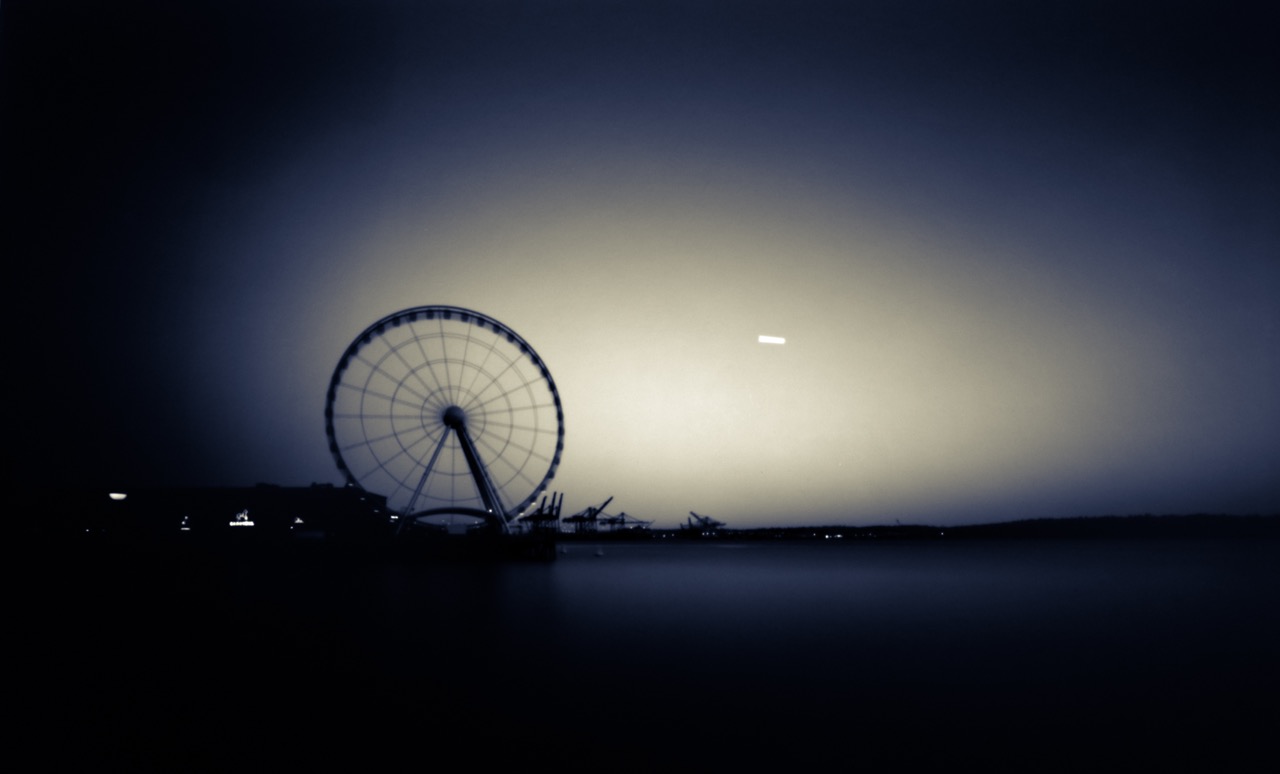
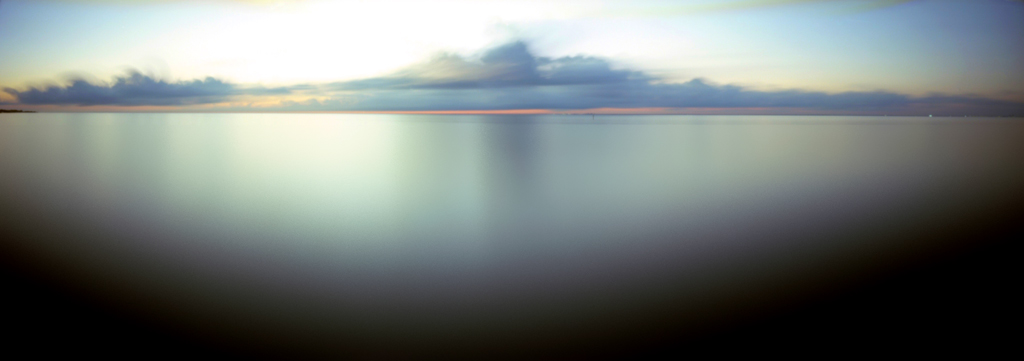
In my photo, Elliott Bay at Dusk, I had my Zero Image 4×5 loaded with a paper negative and pointed at a scene that originally metered at a 5 minute exposure. By the time I was done shooting, the scene was metering at 20 minutes. Overall I exposed for 15 minutes and got a result I’m quite happy with, albeit with quite a bit of nailbiting for that 15 minutes.
For this article we want to learn a bit about working with the light during these challenging times of the day, and I decided to interview Eddie Erdmann for his insights. A quick look at Eddie’s Flickr profile shows that he’s quite adept at shooting pinholes during sunrise and sunset, and can speak with a bit of “been there, done that” authority on the matter.
Do you have a specific amount of time before sunset or after sunrise that you find works best?
It varies. Sometimes the best part of a sunset occurs before the sun is down, and sometimes it occurs well after the sun has dropped below the horizon. If I have a particular location in mind for shooting the sunset, I will try to arrive 30 minutes to an hour before the sun goes down so I can watch and wait for the scene to unfold. In Alaska sunsets can last for a very long time in the summer, so when shooting a sunset here at that time of year, I may end up hanging out for a couple hours. When I’m in the Lower 48, particularly on the Gulf Coast, sunsets are fairly quick because the sun goes down at a much sharper angle. Sometimes I don’t even bother to take my cameras out of my bag because the sunset isn’t especially inspiring. When I’m shooting sunrises, I employ the same 30-minutes-to-an-hour approach. I find that the best moments occur from 30 minutes prior to 30 minutes after the sun rises.
How do you meter for a sunrise or sunset?
I usually spot-meter an area of the scene that I estimate should fall within the middle range of brightness values and go with that exposure time. Usually I choose a cloud that isn’t catching the full rays of the sun. If I’m shooting with Fuji Velvia, I tend to spot-meter some of the brightest parts of the scene as well so as not to blow out the highlights too much. When shooting with Kodak Ektar or black-and-white film, I don’t worry so much about that.
Do you adjust your exposure time as the light changes?
I usually decide on an exposure time before I open the shutter. I determine this time by metering, compensating for reciprocity if necessary and then tacking on a few extra seconds (or as much as a minute or more for longer exposures) to accommodate the diminishing light of the sunset (or subtracting a few seconds for a sunrise). I find that rough approximations do just fine when working with long exposure times.
Do you find that you need to adjust for reciprocity in the middle of an exposure?
If I determine that the scene will require an exposure time that will require me to take into consideration the film’s reciprocity characteristics, then I will do so, but I really don’t think about this once I’ve opened the shutter. I meter the scene, and if necessary I consult my film’s reciprocity data to decide how much I need to adjust the exposure. Then I open the shutter for the amount of time that I’ve determined would be best. A good thing about pinhole photography is that because the exposure times tend to be pretty long, you really don’t have to worry about being terribly exact. I don’t spend a lot of time calculating exposure times. Usually, it takes me only a few seconds to meter the scene, consult a reciprocity-failure chart (actually, at this point, I rarely look at charts–I use only a few different types of film, and I have a decent understanding of their reciprocity) and perform a simple calculation in my head.
We thank Eddie for taking some time out of his hectic schedule to help us capture the amazing light that exists at these times of the day. Hopefully some of this experienced input helps our readers to take advantage of the changing sunlight! Do you have additional questions? If so, put them in the comments and we’ll follow up with Eddie to respond back to you!
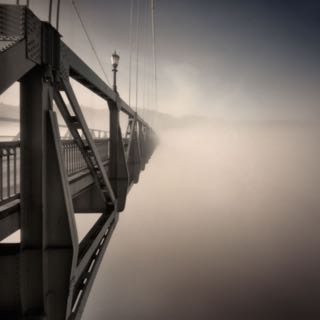
Darius Kuzmickas provides this wonderful perspective of the St. Johns Bridge in Portland Oregon. He used his Zero Image 2000 loaded with Fuji Reala to capture the way the fog blankets the scene in typical Pacific Northwest fashion.
Andrius Šidlauskas created this warm morning bedroom scene with expired Sensia that was cross processed after being shot through his Sharan STD-35. This is a wonderful example of how some of the most amazing photos can be found right at hand.