Tag Archives: technique

ƒ/D Interviews Jana Obscura

Today we’re excited to bring you our interview with Jana Uyeda, AKA Jana Obscura. You can’t get very far in the pinhole world without crossing her path in one way or another. She is a vocal proponent of the pinhole format on social media as well as on the podcast she co-hosts, The Pinhole Podcast (archives, Twitter). Read on to learn about her vision in pinhole, how she built community around pinhole, and get introduced to anamorphic pinhole. Afterwards, be sure to check out her website, Instagram, and her Flickr page for additional pinhole and other photographic goodness.

How did you first come upon the world of pinhole photography? What convinced you to stay?
I learned about pinhole photography through Jeff Soderquist who purchased a Zero Image 2000 at Blue Moon Camera in Portland. There were also a number of pinhole groups sharing images on Flickr and I was inspired by the wide angles, the distortions and the unique character of pinhole photography. At the time I was experimenting with film and plastic cameras but when I saw the possibilities of pinhole, I got hooked.

You often accentuate perspective in your pinhole photos. Is this intentional for your pinhole work? Or subconscious?
I would say it’s due to necessity, or maybe it’s a necessity due to my laziness. I rarely carry a tripod with me, in fact it’s one of the reasons I enjoy pinhole photography. The cameras are smaller, light weight and I don’t need a lot of gear to shoot. I also don’t carry light meters or paper or notebooks either, I just bring my camera, film and a mini tripod. This means I spend a lot of time shooting from the floor looking up or using flat surfaces as a makeshift tripod. It is also my experience that many places don’t allow tripods, so my use of floors and handrails means I’m capturing extreme perspectives.

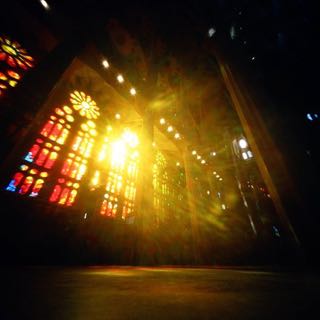
[singlepic id=356 w=600]Sagrada Familia, ©Jana Uyeda 2016[/singlepic]


What other aspects of pinhole do you find yourself trying to exploit?
My first experiments focused on stillness and movement. Since pinhole is a longer exposure, I was looking to frame motion within a motionless environment. A passenger standing against the rails on my water taxi commute, plates on a lazy susan at a dim sum restaurant, shopping carts at Costco and flags waving in the wind. It was challenging because I had to be very aware of the exposure time and my subject. If the exposure time was too long, the subject in motion would ghost out of the image entirely.

[singlepic id=352 w=600]Dim Sum, ©Jana Uyeda 2016[/singlepic]


Subjects ghosting out are exactly why I started experimenting with what I called multi-lapsing – multiple exposures timed when people were in almost the same place to build up one exposure. Which reminds me, I need to do more of. What do you feel the challenges of pinhole add to your creative thought pattern? Do you find anything you’ve learned in pinhole changing how you shoot in other formats?
I think the challenges of pinhole make me more adventurous. I know there are elements I cannot control and I cannot always anticipate how much the final image will capture, even if I know the angle of view for my camera. There were a few months when I experimented with infrared 4×5 pinhole which I thought would be insane and it turns out, it was insane – in a good way! To your other question about pinhole changing how I shoot other formats, I can genuinely say I’ve become a dedicated medium format shooter since I started with pinhole photography. When I shoot with my Rolleiflex I find myself using that lower angle to emphasize perspective, something you noticed from my pinhole work. I’m realizing that perhaps I’m more comfortable with the Rolleiflex because the TLR allows me to shoot from a lower angle. In my photography school I’d worked with 35mm almost exclusively, but since I started shooting pinhole I’ve made investments in developing and scanning equipment. I have a workflow based on 120 film now.

[singlepic id=357 w=600]4×5 IR, ©Jana Uyeda 2016[/singlepic]


As if pinhole photography isn’t obscure enough of a photographic form, you tend to work quite a bit in anamorphic pinhole. For the folks who are interested in anamorphic, what do you feel are the best subjects to start shooting anamorphic and learning the format?
Thanks for the reminder, I need to shoot more this summer. For those interested in anamorphic pinhole, I would recommend looking for straight, horizontal lines to learn about exposure, angle of view and how to work your camera. Anamorphic is a lot of fun but it takes a few rolls to understand how to position the camera and expose it correctly. Underexpose and your image will have dark bands with no shadow detail. Overexpose and the image will have blown out bands where the light hits the film plane. I have been most successful with BW film but there are so many talented photographers doing amazing work with C41. I started shooting fences and rows of books in the library which helped me “see” and then I tried shooting more deliberately for that anamorphic bend.

[singlepic id=354 w=600]Palm Trees, ©Jana Uyeda 2016 (anamorphic pinhole)[/singlepic]


[singlepic id=351 w=600]Chairs, ©Jana Uyeda 2016 (anamorphic pinhole)[/singlepic]


Is there any subject matter that you try to shoot with pinhole and just can’t seem to get the shot? Why not?
Sunlight and sunbeams. This isn’t a big deal since I live in Seattle, but when the sun comes out and I point my camera in that direction I get crazy light sprays across my image. There are pinhole photographers who do gorgeous work with sunlight and it creates this lovely rainbow of light on their image. I just can’t figure it out.

[singlepic id=353 w=600]IR Mess, ©Jana Uyeda 2016[/singlepic]


I hear ya – I lived in Seattle for a couple years and from November through June the sky in particular can be a real challenge. How does your creative process tend to flow? Are you looking for something in particular? Or do you come across something that seems interesting and try to find how to shoot it?
I look for interesting subjects that I can really get close to. Since pinhole has such a wide angle of view, I feel I lose too much detail when I shoot a broad landscape scene. When I shoot sunrise shots near the water I look for rocks or other items of interest that I can incorporate in the foreground. If I’m shooting a carousel or flags on a boat I look for something stationary and often I’ll place something deliberately in front of the camera. When I’m travelling I let people fill the space because the shape of their motion is perfect. Maybe a good challenge to myself is to shoot broad, sweeping landscapes and find a new way to make those pinholes more interesting to me. I saw some Hiroshi Sugimoto prints in person recently and I’m inspired to shoot simpler. I’m going to try that this summer.

[singlepic id=355 w=600]Pont del Petroli, ©Jana Uyeda 2016[/singlepic]


Besides your personal photography, you regularly contribute to a number of other publications, help run Pdexposures, and co-host the Pinhole Podcast. It sounds exhausting! What was the least expected benefit from doing all this?
The community. Connecting with like-minded photographers from across the globe is the most surprising and the greatest benefit. Beyond Worldwide Pinhole Photography Day there are postcard exchanges, meetup groups, gallery shows, DIY classes and art projects. Pinhole is not something I assume most people know about outside of their high school b&w photo class, but I feel there’s a growing trend towards embracing this form of photography. Social media plays a big part in bringing the community together, though I think most pinhole photographers also have stories about random interactions with a fellow pinholer in person. We’re weirdos and we’re out there and it’s awesome.

Do you have any recommendations for people who’d want to start up a pinhole club in their local area?
Yes, just do it! I met Todd Schlemmer through Twitter years ago and even though he lives in Seattle, I’d never met him until Twitter brought us together. He’s been building various 3D printed pinhole cameras and eventually started a meetup for local pinhole folk to connect. It’s been great. I get asked questions all the time when I’m waiting patiently for my exposures and I hope I’ve encouraged people to try pinhole. I usually end up chatting with a mix of film photographers, students, and creative builders then invite them to join us on our next stroll. Blue Moon Camera in Portland does a fantastic job of promoting pinhole photography as well which sustains a network of artists in the northwest. So my recommendations would be, use social media, connect and join photography meetups in your area.

[singlepic id=358 w=600]WPPD 2014, ©Jana Uyeda 2016[/singlepic]


Paper Negatives: Refining the Process

If you’ve been following ƒ/D closely, you’ve probably seen that we’ve featured some of Marko Umicevic’s images before (here and here). His images of Croatian scenery carry a distinctive smoothness in tonality and transitions that suit the subject matter expertly.

Marko often relies on paper negatives. It’s a medium I’ve personally used a little, and have always been intrigued to learn more about. I was surprised to see a particular aspect of Marko’s process notes: R09 1+100. I thought it was a typo, and then when I saw his Under the Trees, I saw that it was R09 1+200, and I had to pursue this further. R09, the modern incantation of Rodinal, is more often than not a film developer. Moreover, when used for paper, the recommended dilution is usually 1+10 or 1+20.

Over the course of a few emails, I got the chance to quiz Marko about his Rodinal paper development technique further. I’m pleased to present the highlights of that conversation here.

Marko, when I look at your images, and consider that you’re using Rodinal in 1+100 or 1+200, it appears that you get a longer tonal scale than you’d normally get from a paper developer. Is that accurate?
You are right. That’s what Rodinal does in comparison to standard paper developers when used at higher dilution than normal! At 1:200 it works very slowly, doesn’t penetrate deeply inside the paper base and reduces silver mostly on top. This “flat-top” procedure (similar to water bath) evens out the contrast more efficiently since it contracts highlights that are prone to blow out when development starts! (And highlights are something to keep in mind when dealing with paper negatives) Rodinal works as an excellent paper negative developer and allows you to fine tune contrast of your images. Unfortunately, at higher dilution it’s quickly exhausted and that requires extra precaution at development sessions.

Wide tonality of some of my images, beside highly diluted Rodinal, is partially result of fiber based grade 2  paper I’m using (conventionally: normal grade paper). Lower grade gives lower contrast, i.e. better or wider mid-tone values while fiber base due to its higher amount of deposited silver brings to overall picture depth. Same effect can’t be achieved with VC/RC paper!

So, it’s a balance between Rodinal dilution, developing procedure and graded FB paper I’m used to and know very well. Not to mention the importance of exposure that needs to be as exact as possible.

Chrysopoeia, ©Marko Umicevic 2015

Are you using any agitation in your process? Or is it stand development?
It’s usually a stand development with very little agitation or if any. In the case of Under the Trees – due to high scenery contrast – negative was developed with almost no agitation at all. The thing is, while proceeding with stand development, if I see that developer is exhausted or near exhaustion and works extremely slowly I would agitate it if necessary. This would bring some power to it but results wouldn’t be the same as with stand development done with freshly mixed batch.

Outer Walls, ©Marko Umicevic 2015

Are you pre-flashing your paper negatives first?
When working with pinhole camera and paper (and I do both almost exclusively) I try to keep the whole process as pure as possible. Pre-flashing paper can slightly increase the emulsion speed and consequently help one keep the contrast inside normal/usable scale if exposure is based on shadow values and measured under difficult or harsh lightning. However, for me if the light isn’t just right – soft, subdued and kind of “touchy” with mostly open shades – I’ll try not to do the picture. That makes pre-flashing in my case irrelevant. Also, I try avoiding the use of any sort of filters, be it color or UV.

Hunted, ©Marko Umicevic 2015

What ISO do you generally find works best for this configuration?
I usually rate my paper (FB Fomabrom grade 2) at ISO12

Speaking of exhaustion, roughly how many negatives do you find you can develop in a batch of Rodinal 1:100 or 1:200?
In my experience, 1L of developer solution at 1+100 is roughly enough for 3 sheets of 8x10in paper, while at 1+200 one can count for 2 sheets. Keep in mind that we are speaking of double weight FB paper! Considering exhaustion, highly diluted Rodinal in a tray has full working life of roughly 25 minutes at 20°C. So, when developing at higher dilution I try to bring picture to life very slowly, but starve to finish the procedure fast. With practice and confidence this quickly becomes a routine and a method.

Leaning Towers, ©Marko Umicevic 2015

For those that aren’t familiar with the Development by Inspection technique (as opposed to time and temperature), can you describe the process? How do you know when to pull the print from the developer?
Basically, developing paper negatives is very similar to developing enlarged prints in a standard darkroom processing. But, unlike standard paper developer and standard procedure that mostly urges for fixed time, developing paper negatives in Rodinal is less restrictive and more open to process variation at the development stage. Higher Rodinal dilution brings even contrast at prolonged development time allowing one to pleasently observe, control and eventually modulate picture tonality under the safelight. Decision like „should I agitate or not“ or „can I stop it now“ are all made under inspection! Also, when working with Rodinal one has to keep in mind Rodinal’s „single-shot nature“ genuinly formulated for film and not for paper! Issues of this old chemical formula comes to life at stand development in a tray that in my configuration often lasts between 8 to 20 minutes. Paper fogging from safelight or developer oxidation are expected difficulties that I need to count on. You would rarely experience this with standard paper development in standard darkroom procedure – be it print or negative.

In Rodinal my paper negatives are usually developed as follow:

Firstly, I push the paper with the emulsion side facing down inside shallow tray filled with developer and with the help of tongs try to keep the paper beneath developer surface until I feel its thoroughly soaked. Then I slowly (!) agitate the tray for a brief moment.

After first minute I flip the paper upside so I can see how the picture is coming out. At 1:100 properly exposed highlights starts to occur after about two minutes. Keeping an eye on highlights when developing really starts and observing the speed they are coming out makes help in evaluating final contrast and gives signals for further agitation if necessary. Developing is finished when shadow details are fully developed. That’s the point when I pull the paper out of developer tray.
Dilution and Rodinal developing time in a reference to desired negative contrast are evaluated on my expectations and sometimes by the notes I write on the exposures and scene/subject light values. Experience in working with paper and darkroom materials I’m familiar with plays great key of roll in my processes. Usually when I standardize the procedure (exposure/paper/developer combination) I can count on timing what makes developing by inspection at least for the sake of contrast control – not so necessary. Still, I enjoy it very much to watch how picture is slowly drawing itself and this work of magic can be quite thrilling on larger sheets of paper!

Mirror Meditations, ©Marko Umicevic 2015


More of Marko’s work can be found on his Flickr page.


Changing Light: Managing the Long Exposures

Many of us who’ve been around photography for much time at all have been introduced to the concept of the Golden Hour – that time just after sunrise and just before sunset. The light during this time can be truly amazing, and has served as the drama of numerous photos over the years.

The challenge for us pinholers though, is that our cameras often require a longer exposure during these times of day. Moreover, as the exposure time increases, the intensity of the sunlight can change rapidly, leading to complexities in our exposure. The effect can be compounding, especially on slower capture methods such as paper negatives.

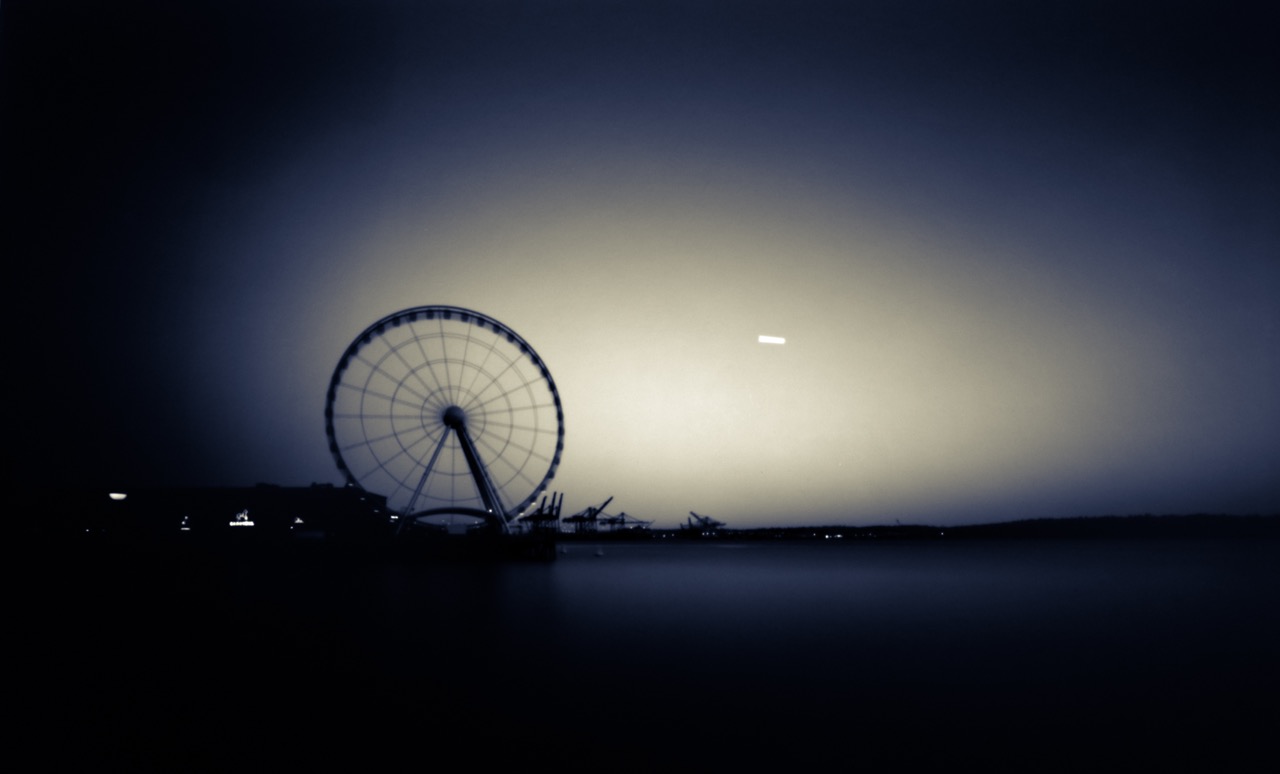
In my photo, Elliott Bay at Dusk, I had my Zero Image 4×5 loaded with a paper negative and pointed at a scene that originally metered at a 5 minute exposure. By the time I was done shooting, the scene was metering at 20 minutes. Overall I exposed for 15 minutes and got a result I’m quite happy with, albeit with quite a bit of nailbiting for that 15 minutes.

Elliott Bay at Dusk, ©Kier Selinsky 2015


For this article we want to learn a bit about working with the light during these challenging times of the day, and I decided to interview Eddie Erdmann for his insights. A quick look at Eddie’s Flickr profile shows that he’s quite adept at shooting pinholes during sunrise and sunset, and can speak with a bit of “been there, done that” authority on the matter.

Do you have a specific amount of time before sunset or after sunrise that you find works best? 
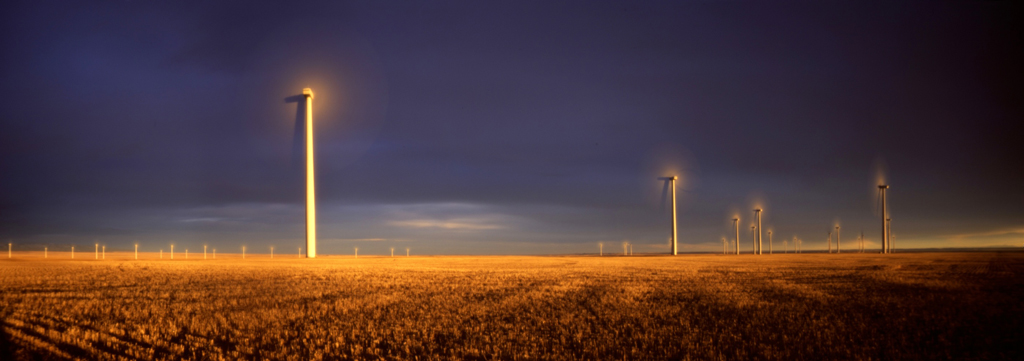
It varies. Sometimes the best part of a sunset occurs before the sun is down, and sometimes it occurs well after the sun has dropped below the horizon. If I have a particular location in mind for shooting the sunset, I will try to arrive 30 minutes to an hour before the sun goes down so I can watch and wait for the scene to unfold. In Alaska sunsets can last for a very long time in the summer, so when shooting a sunset here at that time of year, I may end up hanging out for a couple hours. When I’m in the Lower 48, particularly on the Gulf Coast, sunsets are fairly quick because the sun goes down at a much sharper angle. Sometimes I don’t even bother to take my cameras out of my bag because the sunset isn’t especially inspiring. When I’m shooting sunrises, I employ the same 30-minutes-to-an-hour approach. I find that the best moments occur from 30 minutes prior to 30 minutes after the sun rises.

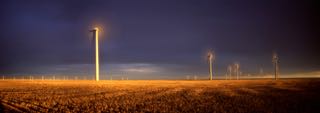
Eddie Erdmann - Judith Gap Wind Energy Center at Sunset
Judith Gap Wind Energy Center at Sunset, ©Eddie Erdmann 2015

How do you meter for a sunrise or sunset? 
I usually spot-meter an area of the scene that I estimate should fall within the middle range of brightness values and go with that exposure time. Usually I choose a cloud that isn’t catching the full rays of the sun. If I’m shooting with Fuji Velvia, I tend to spot-meter some of the brightest parts of the scene as well so as not to blow out the highlights too much. When shooting with Kodak Ektar or black-and-white film, I don’t worry so much about that.

Do you adjust your exposure time as the light changes? 
I usually decide on an exposure time before I open the shutter. I determine this time by metering, compensating for reciprocity if necessary and then tacking on a few extra seconds (or as much as a minute or more for longer exposures) to accommodate the diminishing light of the sunset (or subtracting a few seconds for a sunrise). I find that rough approximations do just fine when working with long exposure times.

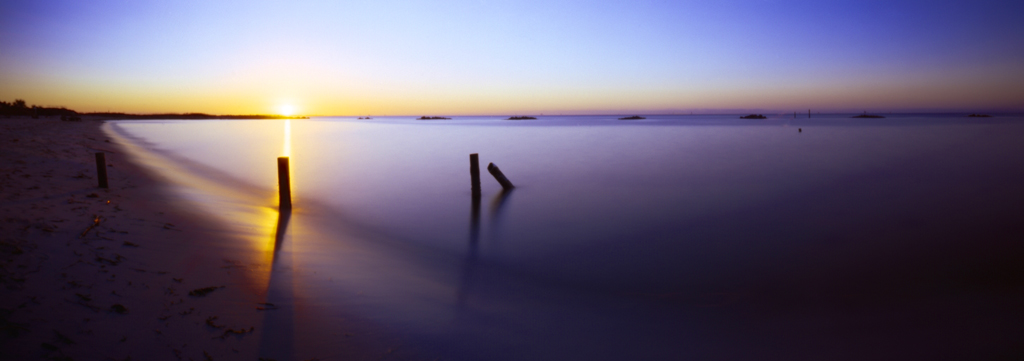
Eddie Erdmann - Pinhole Sunrise on Dauphin Island
Pinhole Sunrise on Dauphin Island, ©Eddie Erdmann 2015

Do you find that you need to adjust for reciprocity in the middle of an exposure?
If I determine that the scene will require an exposure time that will require me to take into consideration the film’s reciprocity characteristics, then I will do so, but I really don’t think about this once I’ve opened the shutter. I meter the scene, and if necessary I consult my film’s reciprocity data to decide how much I need to adjust the exposure. Then I open the shutter for the amount of time that I’ve determined would be best. A good thing about pinhole photography is that because the exposure times tend to be pretty long, you really don’t have to worry about being terribly exact. I don’t spend a lot of time calculating exposure times. Usually, it takes me only a few seconds to meter the scene, consult a reciprocity-failure chart (actually, at this point, I rarely look at charts–I use only a few different types of film, and I have a decent understanding of their reciprocity) and perform a simple calculation in my head.

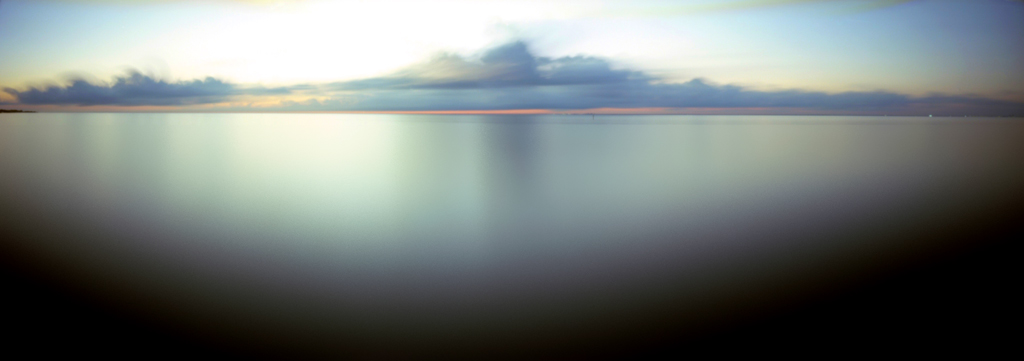
Eddie Erdmann - Mobile Bay Just After Sunset
Mobile Bay Just After Sunset, ©Eddie Erdmann 2015


We thank Eddie for taking some time out of his hectic schedule to help us capture the amazing light that exists at these times of the day. Hopefully some of this experienced input helps our readers to take advantage of the changing sunlight! Do you have additional questions? If so, put them in the comments and we’ll follow up with Eddie to respond back to you!


Technique: Multi-Lapse

A recurring component of pinhole photography is the long exposure time. Even out in bright sunlit skies we’ll often find the proper exposure to be 1 or 2 seconds. The result of course is that parts of your composition which are in motion – flags, people, trees in the wind, etc – will blur from the motion.

Seeing what the motion will do on the final photograph is part of the appeal of pinhole photography. Sometimes the results surpass our expectations. Continue reading Technique: Multi-Lapse