Editor’s note: all images on this post are ©Diane Peterson
We here at f/D love bringing great photographs to your screens. Our goal is to take you away from where you are at your place in time and deliver you to a place of inspiration and exploration. One of our favorite ways of bringing you into our world is by speaking directly with the photographers who create the works that we present on our site. We search carefully to find people who truly love the work. These people love to share their stories and views on photography. After all, a photographer is also a story teller who uses the waves of light to replace their words.
This week’s featured artist was a pleasure to speak with. Diane Peterson’s photographs are saturnine with an ethereal tone. Her images are striking yet soothing. I hope you enjoy her perspectives as much as we do. It is much to our pleasure to share with you our interview and her works.
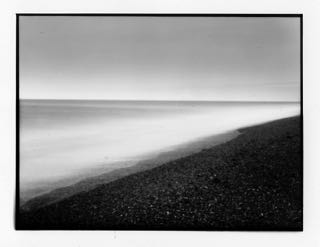
[singlepic id=149 w=200 float=right] [/singlepic]Looking at your blog many of your photographs depict the anthropomorphization of characters and animals – see your post from July 2, 2014. What interests you to create pinholes with these subjects?
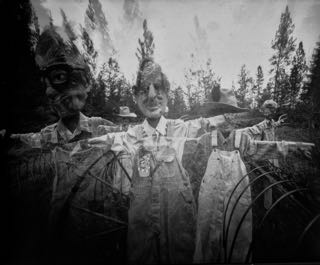
In my “Perfect World” I would have numerous humans both adult and children ready to step in to my make believe world and take on the persona of whatever character I want to photograph. However, we live in a relatively isolated area without neighbors and I don’t really have people I can call on to fill in these rolls. About five years ago I realized I could build life size mannequins to use in these situations. I have a background in costume design and clothing construction so whatever I didn’t have in my personal wardrobe was easily created to dress these “people”. Making the mannequins in my size saved me a lot of time and work with outfitting them. I do however keep my eyes open for vintage garments. I started making my own dolls at the age of eight so this is just a natural progression..bigger dolls! I also made dolls with animal faces, masks just make this process a bit quicker and easier. There are so many photographers out there shooting images of beautiful people and I have never liked the idea of doing the same thing as the next guy. Quirky seems to be my forte’. To me photography is about seeing the hidden picture, something that doesn’t seem obvious..sure, there is a beautiful dress but what is it about the creature wearing the dress, standing in a forest or by a falling down building. I have a very active imagination and these are the kinds of things I enjoy. Some would be totally oblivious to what is happening, so for those my work would probably be boring or strange. Although the mannequin idea came about several years ago it was only a couple years ago I got the idea to add a mask to these “girls”..I think the popular Portland based TV series “Grimm” had a lot to do with the mask idea.
[singlepic id=156 w=600]Rabbit 2, ©Diane Peterson 2015[/singlepic]
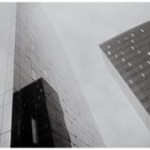
[singlepic id=152 w=200 float=left][/singlepic]Many of your photos vary on whether you are using paper negatives or different types of film. Do you have a preferred medium or do you like to try a little of everything?
When I first started doing photography I wanted to use film.. At about the same time I started seeing references to “pinhole” cameras and seeing incredible work being done by a few photographers, with some mention of “paper”, I had no idea what they were talking about. After a few searches on the internet I was excited to get started. However I was entirely ignorant to most of what happens with film and paper and how they become the finished product. I found the name of someone using paper in her pinhole images , took a chance and wrote her asking if she could give me pointers on how she used film paper. She responded by sending me a large roll of 4 inch wide stock..yards and yards of it! There are some incredible generous people in the photography world. I now use paper in about 95% of my pinholes. I also use paper in some medium format cameras such as Holga ,Diana and my Agfa Clack. I like to experiment and cutting small pieces of paper and positioning it with bits of scotch tape lets me do this without wasting and entire roll of film.
[singlepic id=160 w=600]Valentine, ©Diane Peterson 2015[/singlepic]
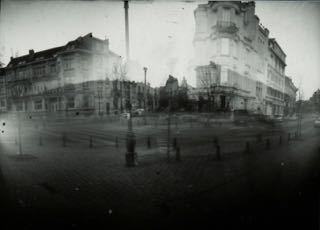
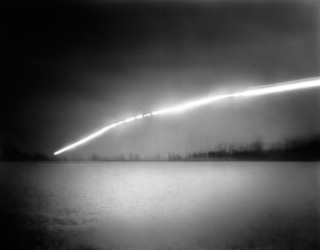
[singlepic id=158 w=200 float=right][/singlepic]Storm Warning, ©Diane Peterson 2015[/singlepic]Your pinholes carry striking and sometimes startling emotion yet there are nearly no human faces in the photos on your blog. Why do you choose to communicate without living faces?
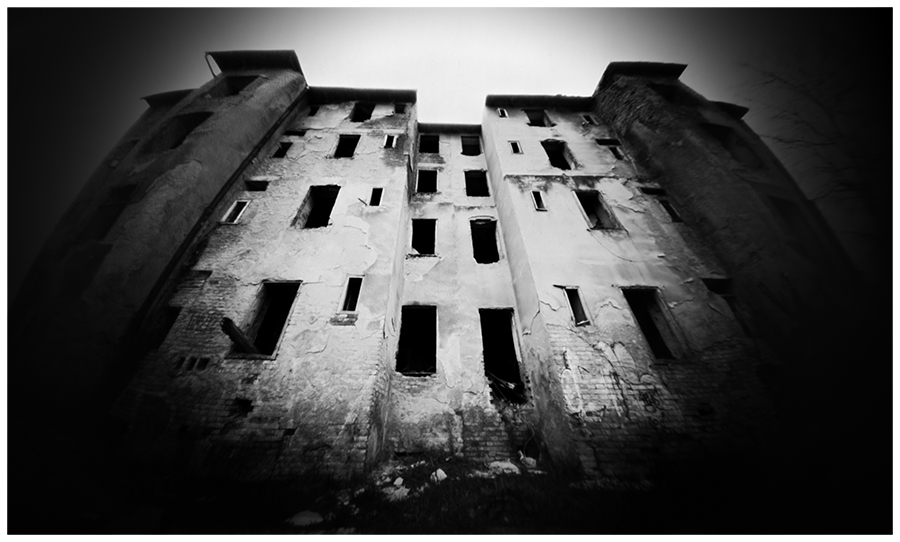
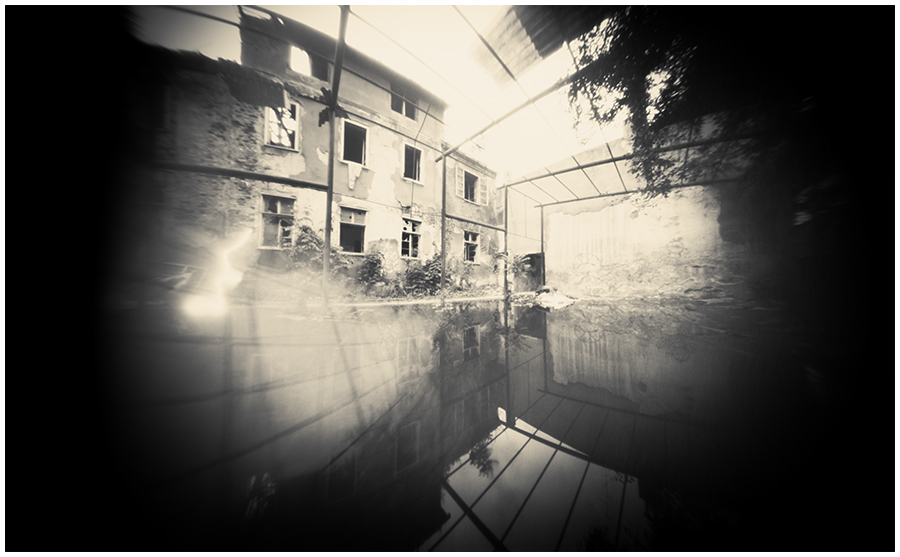
Many people have said this exact thing to me! I think many of us derive emotion from things totally unexpected. I know I do. For instance, I take a lot of pinhole images of laundry hanging on clothes lines. For some reason this creates a sense of well being with me. I have taken these kind of images in Ecuador, in Greece, Iceland, Great Britain, France, Italy..and all have a similar feeling for me. The patience of standing somewhere and hanging out the laundry..what could be simpler and yet many people comment how much they like these shots. So it does speak to many of us, probably drawing back to a childhood memory. I have a favorite deserted, falling down farmhouse not far from my home that I love taking pictures of..mostly pinhole, other times a normal camera. I never tire of it, and it always makes me feel welcome. How that can be when no one has lived there in probably seventy five years is amazing. This also comes from what I mentioned above, not having living faces, so I am somewhat compelled to find interesting places with lots of character that have the ability to elicit some emotion from the viewer. Probably a good thing my photos have this ability as I don’t really have a choice and I have become so use to this style that now it seems second nature to my work.
[singlepic id=145 w=600]Clothesline 4, ©Diane Peterson 2015[/singlepic]
[singlepic id=159 w=200 float=right] [/singlepic]What is it about the pinhole camera that you love versus a glass lensed camera?
Where do I begin! From the first time I made a successful image using a pinhole camera I was hooked. I first read about pinhole cameras in maybe 2006 in an issue of the British publication “Black & White Photography”. There was an incredible spread of articles highlighting several people using pinholes at that time. I can honestly say that I still go back and read those pages several times a year. I wanted to know everything I could about pinholes, how to make my own cameras, what these people were shooting, tips on exposure, etc. I have always been the type of person that when they want to know a thing they pursue it to whatever length they need to, and this was no exception. Honestly, with all the incredible cameras out there today most anyone can make a beautiful image. I am not really about the “beautiful” perfect image, with me it’s about doing something “different, even unusual. My work definitely qualifies, and that OK with me. Not everyone will try pinhole. Most people are intimidated by it I think. And it could not be simpler. Everyone has their own methods of getting their desired exposure for instance. I use a handy little app called “pinhole assist”, and I can say that it never lets me down. You put in the information and it comes right back with your exposure. And, my gosh, you can make a pinhole camera from almost anything that can be made light tight. That cookie tin that might get thrown out can easily be turned into the most perfect pinhole camera. How could someone not love that! I have many, many glass lensed cameras but I use them rarely, always returning to one of my pinhole creations. I have several beautifully made commercial pinhole cameras but using a left over cigar box, cookie tin, drink can really delights my sense of creativity. I also make my own pinholes with pieces of brass shim and micro drills I order from the east coast of the U.S. I get requests from all over the world from people needing the pinholes. The bottom line is this..you take a tin can, wooden box, discarded container and make it light tight, add a pinhole and some photo paper and leave it out in the light for a bit and the result is a wonderful image. How could you not love this process!
[singlepic id=144 w=600]Ceramic, ©Diane Peterson 2015[/singlepic]
[singlepic id=155 w=200 float=left][/singlepic]Do you process your own photos or do you send them out for processing? Why?
I have processed my own work for years. When I was first starting out in photography, a friend at the time taught me to develop my own film during a long telephone conversation. Luckily my husband was listening because he remembers details better than I, so I could just ask him what step I was missing and he would know! That was a long time ago. Now I could do it in my sleep. And developing paper is the simplest thing in the world. I have our extra bathroom set up as a darkroom with the overhead light being a safelight. We added a piece of black foam core over the window and instant darkroom. My biggest problem being to remember shutting off the safelight when I am finished! For paper you only need a paper developer , stop bath and fixer. I first started developing paper with Dektol and then tried caffenol. I now also use Rodinol which I really like. There is just something about putting your exposed paper negative into the developer and watching it transform into a tangible piece of art that delights the soul. And the most important reason for doing your own developing..how could you possible wait to have someone else do it!
[singlepic id=148 w=600]3-2, ©Diane Peterson 2015[/singlepic]
The motion in the sheet music in your photo from Feb 19, 2015, conveys an energy in the music in a way I’ve not seen before. What was your process, creatively and technically, in creating this photo?
Ah, yes! Sometimes I find great props but then have to wait for just the right time to use them..I wanted to “hang” the sheet music in a way that I could capture several sheets at a time like when an orchestra has several musicians playing at once..without lots of music stands around I decided to run a piece of hemp across the back of a vintage truck bed and layer the music across. This called for a wide angle pinhole camera with the proper focal length to capture the sheet music close enough so the viewer actually knows what it is. Mind you it also had to be a fairly overcast day, though not too dark so the exposure would be so long as to lose the movement… with just a bit of wind to get the swaying motion I wanted…long but not TOO long. .the old record player was thrown in just for fun, just in case someone missed the fact that this was about “Music”!
[singlepic id=157 w=600]Record Player, ©Diane Peterson 2015[/singlepic]
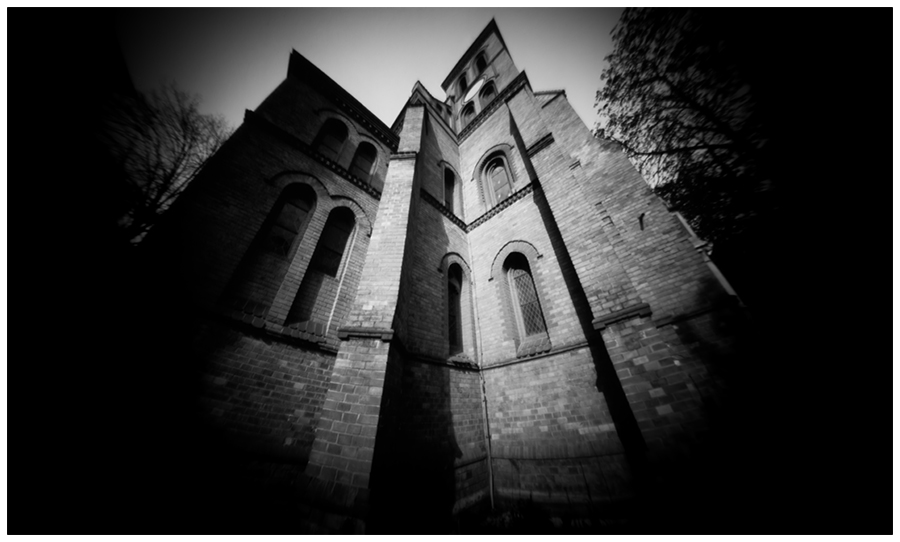
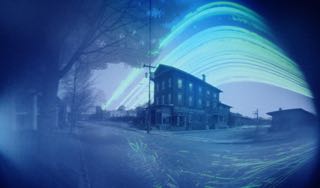
[singlepic id=147 w=200 float=right] [/singlepic]Many of your cameras have a distorting effect to them. Can you tell us about how you introduce this distortion to help with your message?
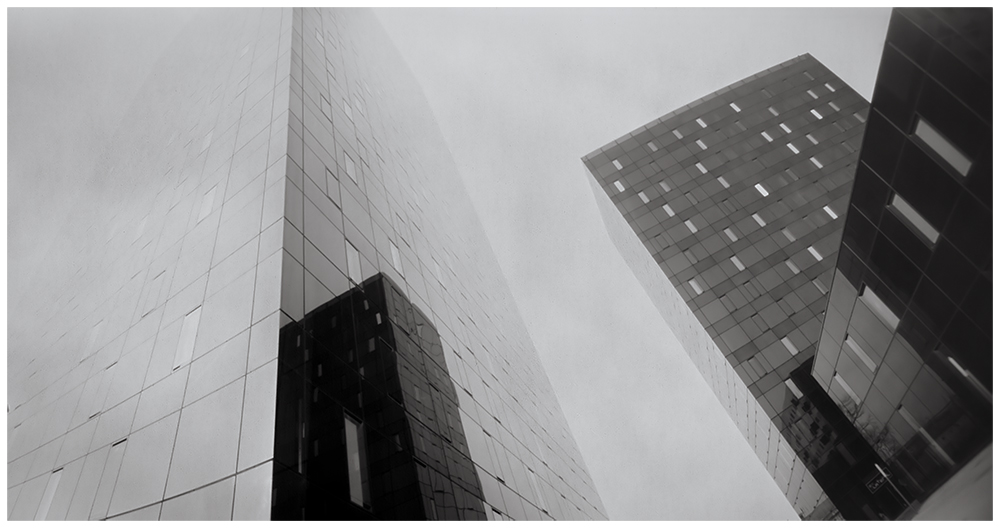
As I mention before I use a lot of created or handmade pinhole cameras to make my images. When I first started out with pinhole I saw images made from circular tins as opposed to square flat “cameras”. This fascinated me. I was eager to try this style of making pinhole images. Just to think one merely had to change the pinhole image taking device positioning from horizontal to vertical or place at a forty-five degree angle to get an unusual picture was incredible in my mind. The curvature of the pinhole tin depending on its diameter can radically change your image. I love distorting the image because it makes the viewer see things in a different way..Not necessarily “better” but just different. And “different” is good with me. I should add that I read just about everything I can find regarding pinhole imagery. Two of my favorite books are “Adventures with Pinhole and Home-made Cameras by John Evans, and Pinhole Photography, by Eric Renner. I would so recommend these books as a creative primer to anyone starting out in Pinhole Photography.
[singlepic id=146 w=600]Otis, ©Diane Peterson 2015[/singlepic]
[singlepic id=151 w=200 float=left] [/singlepic]We all have a voice that we use while we are expressing our creative selves. Do you believe that you have found your voice?
Most definitely! I mentioned that my background was in textiles and much of my work had been photographed for newspapers etc., but never really thought much about being the person behind the camera. While traveling in Europe with my daughter and granddaughter many years ago I started noticing the incredible images captured by my 10 year old (at the time) granddaughter! I started thinking that perhaps I should be doing this. I started looking at architecture and ruins in an entirely different way. I first tried digital imagery and was turned off by the “flatness” of the images and turned to film. But when I discovered pinhole I knew then I had found the answer to “what I want to be when I grow up” I feel amazingly fortunate to have found this “voice”.
[singlepic id=147 w=600]3, ©Diane Peterson 2015[/singlepic]

 June 3: We covered Marko Umicevic’s paper negative process for enhanced tonality.
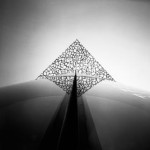 June 19: We got deep in symmetry with Dikal’s pinhole photography.