Tag Archives: black and white

Get Inspired – Prison Through a Pinhole

Editor’s note: The daily pinhole photos are curated and shared to inspire and elevate the pinhole photography artform. Do you have a photo you’d like considered? Tell us about it.

Today’s featured pinhole photo is a beautiful confinement.

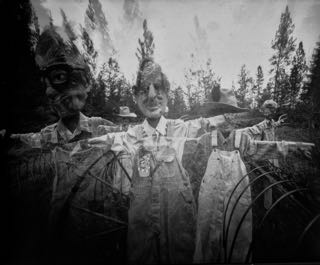
Prison Through a Pinhole
[singlepic id=169 w=600]Prison Through a Pinhole, ©Mark Doxey 2015[/singlepic]

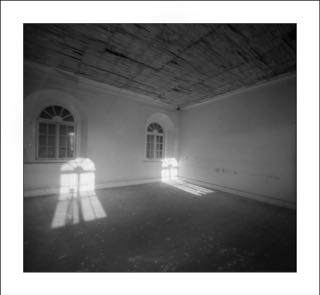
To nab this photo, Mark Doxey actually snuck into this derelict prison in Armagh, Ireland. By donning some hi-vis construction clothes and a hard hat, he was able to get by security by looking the part. It’s a risky maneuver, but appears to have paid off! (ahem, our lawyers want to note that the editors of ƒ/D officially do not condone trespassing.)

More of Mark’s work can be found on Flickr.


Paper Negatives: Refining the Process

If you’ve been following ƒ/D closely, you’ve probably seen that we’ve featured some of Marko Umicevic’s images before (here and here). His images of Croatian scenery carry a distinctive smoothness in tonality and transitions that suit the subject matter expertly.

Marko often relies on paper negatives. It’s a medium I’ve personally used a little, and have always been intrigued to learn more about. I was surprised to see a particular aspect of Marko’s process notes: R09 1+100. I thought it was a typo, and then when I saw his Under the Trees, I saw that it was R09 1+200, and I had to pursue this further. R09, the modern incantation of Rodinal, is more often than not a film developer. Moreover, when used for paper, the recommended dilution is usually 1+10 or 1+20.

Over the course of a few emails, I got the chance to quiz Marko about his Rodinal paper development technique further. I’m pleased to present the highlights of that conversation here.

Marko, when I look at your images, and consider that you’re using Rodinal in 1+100 or 1+200, it appears that you get a longer tonal scale than you’d normally get from a paper developer. Is that accurate?
You are right. That’s what Rodinal does in comparison to standard paper developers when used at higher dilution than normal! At 1:200 it works very slowly, doesn’t penetrate deeply inside the paper base and reduces silver mostly on top. This “flat-top” procedure (similar to water bath) evens out the contrast more efficiently since it contracts highlights that are prone to blow out when development starts! (And highlights are something to keep in mind when dealing with paper negatives) Rodinal works as an excellent paper negative developer and allows you to fine tune contrast of your images. Unfortunately, at higher dilution it’s quickly exhausted and that requires extra precaution at development sessions.

Wide tonality of some of my images, beside highly diluted Rodinal, is partially result of fiber based grade 2  paper I’m using (conventionally: normal grade paper). Lower grade gives lower contrast, i.e. better or wider mid-tone values while fiber base due to its higher amount of deposited silver brings to overall picture depth. Same effect can’t be achieved with VC/RC paper!

So, it’s a balance between Rodinal dilution, developing procedure and graded FB paper I’m used to and know very well. Not to mention the importance of exposure that needs to be as exact as possible.

Chrysopoeia, ©Marko Umicevic 2015

Are you using any agitation in your process? Or is it stand development?
It’s usually a stand development with very little agitation or if any. In the case of Under the Trees – due to high scenery contrast – negative was developed with almost no agitation at all. The thing is, while proceeding with stand development, if I see that developer is exhausted or near exhaustion and works extremely slowly I would agitate it if necessary. This would bring some power to it but results wouldn’t be the same as with stand development done with freshly mixed batch.

Outer Walls, ©Marko Umicevic 2015

Are you pre-flashing your paper negatives first?
When working with pinhole camera and paper (and I do both almost exclusively) I try to keep the whole process as pure as possible. Pre-flashing paper can slightly increase the emulsion speed and consequently help one keep the contrast inside normal/usable scale if exposure is based on shadow values and measured under difficult or harsh lightning. However, for me if the light isn’t just right – soft, subdued and kind of “touchy” with mostly open shades – I’ll try not to do the picture. That makes pre-flashing in my case irrelevant. Also, I try avoiding the use of any sort of filters, be it color or UV.

Hunted, ©Marko Umicevic 2015

What ISO do you generally find works best for this configuration?
I usually rate my paper (FB Fomabrom grade 2) at ISO12

Speaking of exhaustion, roughly how many negatives do you find you can develop in a batch of Rodinal 1:100 or 1:200?
In my experience, 1L of developer solution at 1+100 is roughly enough for 3 sheets of 8x10in paper, while at 1+200 one can count for 2 sheets. Keep in mind that we are speaking of double weight FB paper! Considering exhaustion, highly diluted Rodinal in a tray has full working life of roughly 25 minutes at 20°C. So, when developing at higher dilution I try to bring picture to life very slowly, but starve to finish the procedure fast. With practice and confidence this quickly becomes a routine and a method.

Leaning Towers, ©Marko Umicevic 2015

For those that aren’t familiar with the Development by Inspection technique (as opposed to time and temperature), can you describe the process? How do you know when to pull the print from the developer?
Basically, developing paper negatives is very similar to developing enlarged prints in a standard darkroom processing. But, unlike standard paper developer and standard procedure that mostly urges for fixed time, developing paper negatives in Rodinal is less restrictive and more open to process variation at the development stage. Higher Rodinal dilution brings even contrast at prolonged development time allowing one to pleasently observe, control and eventually modulate picture tonality under the safelight. Decision like „should I agitate or not“ or „can I stop it now“ are all made under inspection! Also, when working with Rodinal one has to keep in mind Rodinal’s „single-shot nature“ genuinly formulated for film and not for paper! Issues of this old chemical formula comes to life at stand development in a tray that in my configuration often lasts between 8 to 20 minutes. Paper fogging from safelight or developer oxidation are expected difficulties that I need to count on. You would rarely experience this with standard paper development in standard darkroom procedure – be it print or negative.

In Rodinal my paper negatives are usually developed as follow:

Firstly, I push the paper with the emulsion side facing down inside shallow tray filled with developer and with the help of tongs try to keep the paper beneath developer surface until I feel its thoroughly soaked. Then I slowly (!) agitate the tray for a brief moment.

After first minute I flip the paper upside so I can see how the picture is coming out. At 1:100 properly exposed highlights starts to occur after about two minutes. Keeping an eye on highlights when developing really starts and observing the speed they are coming out makes help in evaluating final contrast and gives signals for further agitation if necessary. Developing is finished when shadow details are fully developed. That’s the point when I pull the paper out of developer tray.
Dilution and Rodinal developing time in a reference to desired negative contrast are evaluated on my expectations and sometimes by the notes I write on the exposures and scene/subject light values. Experience in working with paper and darkroom materials I’m familiar with plays great key of roll in my processes. Usually when I standardize the procedure (exposure/paper/developer combination) I can count on timing what makes developing by inspection at least for the sake of contrast control – not so necessary. Still, I enjoy it very much to watch how picture is slowly drawing itself and this work of magic can be quite thrilling on larger sheets of paper!

Mirror Meditations, ©Marko Umicevic 2015


More of Marko’s work can be found on his Flickr page.


Get Inspired – 10_4.5_p

Take in today’s featured pinhole in a place of quiet beauty.

10_4.5_p
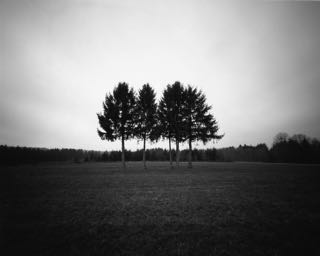
[singlepic id=167 w=600]10_4.5_p, Zero Image 4×5, FOMA fomapan 100, ©De Ferschter 2015[/singlepic]

De Ferschter made this quiescent scene using a Zero Image 4×5 with a single frame added for a focal length of 50mm, with Fomapan 100 film. The way these trees stand apart, like 5 good friends, makes for such a strong composition.

You can find more of De Ferschter’s work on Flickr.


Get Inspired – Archaeologists at the Rhynie Woman Dig

Gather around for today’s featured pinhole photo.

Archaeologists at the Rhynie Woman Dig
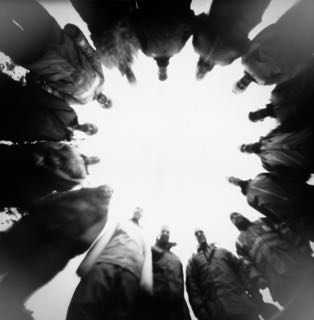
[singlepic id=164 w=600]Archaeologists at the Rhynie Woman Dig, ©Chris Bird 2015[/singlepic]

Chris Bird made this image during the week long Archaeological dig organised by the Rhynie Woman artists collective In the village of Rhynie in Aberdeenshire. He asked the archaeologists to gather around a pinhole camera made from an empty sweet tin containing a paper negative that was place on the floor. The group managed to stay still for the five minute exposure – must be something about the patience required to be an archaeologist.

More of Chris’s work can be found on Flickr, Facebook, or his personal site. Or you can find him on Twitter.


ƒ/D Interview: Diane Peterson

Editor’s note: all images on this post are ©Diane Peterson

We here at f/D love bringing great photographs to your screens.  Our goal is to take you away from where you are at your place in time and deliver you to a place of inspiration and exploration.  One of our favorite ways of bringing you into our world is by speaking directly with the photographers who create the works that we present on our site.  We search carefully to find  people who truly love the work.  These people love to share their stories and views on photography.  After all, a photographer is also a story teller who uses the waves of light to replace their words.

This week’s featured artist was a pleasure to speak with.  Diane Peterson’s photographs are saturnine with an ethereal tone. Her images are striking yet soothing.  I hope you enjoy her perspectives as much as we do.  It is much to our pleasure to share with you our interview and her works.

[singlepic id=149 w=200 float=right] [/singlepic]Looking at your blog many of your photographs depict the anthropomorphization of characters and animals – see your post from July 2, 2014.  What interests you to create pinholes with these subjects?
In my “Perfect World” I would have numerous humans both adult and children ready to step in to my make believe world and take on the persona of whatever character I want to photograph. However, we live in a relatively isolated area without neighbors and I don’t really have people I can call on to fill in these rolls. About five years ago I realized I could build life size mannequins to use in these situations. I have a background in costume design and clothing construction so whatever I didn’t have in my personal wardrobe was easily created to dress these “people”. Making the mannequins in my size saved me a lot of time and work with outfitting them. I do however keep my eyes open for vintage garments. I started making my own dolls at the age of eight so this is just a natural progression..bigger dolls! I also made dolls with animal faces, masks just make this process a bit quicker and easier.  There are so many photographers out there shooting images of beautiful people and I have never liked the idea of doing the same thing as the next guy. Quirky seems to be my forte’. To me photography is about seeing the hidden picture, something that doesn’t seem obvious..sure, there is a beautiful dress but what is it about the creature wearing the dress, standing in a forest or by a falling down building. I have a very active imagination and these are the kinds of things I enjoy. Some would be totally oblivious to what is happening, so for those my work would probably be boring or strange. Although the mannequin idea came about several years ago it was only a couple years ago I got the idea to add a mask to these “girls”..I think the popular Portland based TV series “Grimm” had a lot to do with the mask idea.

[singlepic id=156 w=600]Rabbit 2, ©Diane Peterson 2015[/singlepic]


[singlepic id=152 w=200 float=left][/singlepic]Many of your photos vary on whether you are using paper negatives or different types of film.  Do you have a preferred medium or do you like to try a little of everything?
When I first started doing photography I wanted to use film.. At about the same time I started seeing references to “pinhole” cameras and seeing incredible work being done by a few photographers, with some mention of “paper”, I had no idea what they were talking about. After a few searches on the internet I was excited to get started. However I was entirely ignorant to most of what happens with film and paper and how they become the finished product. I found the name of someone using paper in her pinhole images , took a chance and  wrote her  asking if she could give me pointers on how she used film paper. She responded by sending me a large roll of 4 inch wide stock..yards and yards of it! There are some incredible generous people in the photography world. I now use paper in about 95% of my pinholes. I also use paper in some medium format cameras such as Holga ,Diana and my Agfa Clack. I like to experiment and cutting small pieces of paper and positioning it with bits of scotch tape  lets me do this without wasting and entire roll of film.

[singlepic id=160 w=600]Valentine, ©Diane Peterson 2015[/singlepic]


[singlepic id=158 w=200 float=right][/singlepic]Storm Warning, ©Diane Peterson 2015[/singlepic]Your pinholes carry striking and sometimes startling emotion yet there are nearly no human faces in the photos on your blog.  Why do you choose to communicate without living faces?
Many people have said this exact thing to me! I think many of us derive emotion from things totally unexpected. I know I do. For instance, I take a lot of pinhole images of laundry hanging on clothes lines. For some reason this creates a sense of well being with me.  I have taken these kind of images in Ecuador, in Greece, Iceland, Great Britain, France, Italy..and all have a similar feeling for me. The patience of standing somewhere and hanging out the laundry..what could be simpler and yet many people comment how much they like these shots. So it does speak to many of us, probably drawing  back to a childhood memory. I have a favorite deserted, falling down farmhouse not far from my home that I love taking pictures of..mostly  pinhole, other times a normal camera. I never tire of it, and it always makes me feel welcome. How that can be when no one has lived there in probably seventy five years is amazing. This also comes from what I mentioned above, not having living faces, so I am somewhat compelled to find interesting places with lots of character that have the ability to elicit some emotion from the viewer. Probably a good thing my photos have this ability as I don’t really have a choice and I have become so use to this style that now it seems second nature to my work.

[singlepic id=145 w=600]Clothesline 4, ©Diane Peterson 2015[/singlepic]


[singlepic id=159 w=200 float=right] [/singlepic]What is it about the pinhole camera that you love versus a glass lensed camera?
Where do I begin! From the first time I made a successful image using a pinhole camera I was hooked. I first read about pinhole cameras in maybe 2006 in an issue of the British publication “Black & White Photography”. There was an incredible spread of articles highlighting several people using pinholes at that time. I can honestly say that I still go back and read those pages several times a year. I wanted to know everything I could about pinholes, how to make my own cameras, what these people were shooting, tips on exposure, etc. I have always been the type of person that when they want to know a thing they pursue it to whatever length they need to, and this was no exception. Honestly, with all the incredible cameras out there today most anyone can make a beautiful image. I am not really about the “beautiful” perfect image, with me it’s about doing something “different, even unusual. My work definitely qualifies, and that OK with me. Not everyone will try pinhole. Most people are intimidated by it I think. And it could not be simpler. Everyone has their own methods of getting their desired exposure for instance. I use a handy little app called “pinhole assist”, and I can say that it never lets me down. You put in the information and it comes right back with your exposure. And, my gosh, you can make a pinhole camera from almost anything that can be made light tight. That cookie tin that might get thrown out can easily be turned into  the most perfect pinhole camera. How could someone not love that! I have many, many glass  lensed cameras but I use them rarely, always returning to one of my pinhole creations. I have several  beautifully made commercial pinhole cameras but using a left over cigar box, cookie tin, drink can really delights my sense of creativity. I also make my own pinholes with pieces of brass shim and micro drills I order from the east coast of the U.S. I get requests from all over the world from people needing the pinholes. The bottom line is this..you take a tin can, wooden box, discarded container and make it light tight, add a pinhole and some photo paper and leave it out in the light for a bit and the result is a wonderful image. How could you not love this process!

[singlepic id=144 w=600]Ceramic, ©Diane Peterson 2015[/singlepic]


[singlepic id=155 w=200 float=left][/singlepic]Do you process your own photos or do you send them out for processing?  Why?
I have processed my own work for years. When I was first starting out in photography, a friend at the time taught me to develop my own film during a long telephone conversation. Luckily my husband was listening because he remembers details better than I, so I could just ask him what step I was missing and he would know! That was a long time ago. Now I could do it in my sleep. And developing paper is the simplest thing in the world. I have our extra bathroom set up as a darkroom with the overhead light being  a safelight. We added a piece of black foam core over the window and instant darkroom. My biggest problem being to remember shutting off the safelight when I am finished! For paper you only need a paper developer , stop bath and fixer. I first started developing paper with Dektol and then tried caffenol. I now also use Rodinol which I really like. There is just something about putting your exposed paper negative into the developer and watching it transform into a tangible piece of art that delights the soul. And the most important reason for doing your own developing..how could you  possible wait to have someone else do it!

[singlepic id=148 w=600]3-2, ©Diane Peterson 2015[/singlepic]


The motion in the sheet music in your photo from Feb 19, 2015, conveys an energy in the music in a way I’ve not seen before. What was your process, creatively and technically, in creating this photo?
Ah, yes! Sometimes I find great props but then have to wait for just the right time to use them..I wanted to “hang” the sheet music in a way that I could capture several sheets at a time like when an orchestra has several musicians playing at once..without lots of music stands around I decided to run a piece of hemp across the back of a vintage truck bed and layer the music across. This called for a  wide angle pinhole camera with the proper focal length to capture the sheet music close enough so the viewer actually knows what it is. Mind you it also had to be a fairly overcast day, though not too dark so the exposure would be so long as to lose the movement… with just a bit of wind to get the swaying motion I wanted…long but not TOO long. .the old record player was thrown in just for fun, just in case someone missed the fact that this was about “Music”!

[singlepic id=157 w=600]Record Player, ©Diane Peterson 2015[/singlepic]


[singlepic id=147 w=200 float=right] [/singlepic]Many of your cameras have a distorting effect to them. Can you tell us about how you introduce this distortion to help with your message?
As I mention before I use a lot of created or handmade pinhole cameras to make my images. When I first started out with pinhole I saw images made from circular tins as opposed to square flat “cameras”. This fascinated me. I was eager to try this style of making pinhole images. Just to think one merely had to change the pinhole image taking device positioning from horizontal to vertical or place at a forty-five degree angle to get an unusual picture was incredible in my mind. The curvature of the pinhole tin depending on its diameter can radically change your image.  I love distorting the image because it makes the viewer see things in a different way..Not necessarily “better” but just different. And “different” is good with me. I should add that I read just about everything I can find regarding pinhole imagery. Two of my favorite books are “Adventures with Pinhole and Home-made Cameras by John Evans, and Pinhole Photography, by Eric Renner. I would so recommend these books as a creative primer  to anyone starting out in Pinhole Photography.

[singlepic id=146 w=600]Otis, ©Diane Peterson 2015[/singlepic]


[singlepic id=151 w=200 float=left] [/singlepic]We all have a voice that we use while we are expressing our creative selves.  Do you believe that you have found your voice?  
Most definitely! I mentioned that my background was in textiles and much of my work had been photographed for newspapers etc., but never really thought much about being the person behind the camera. While traveling in Europe with my daughter and granddaughter many years ago I started noticing the incredible images captured by my 10 year old (at the time) granddaughter! I started thinking that perhaps I should be doing this. I started looking at architecture and ruins in an entirely different way. I first tried digital imagery and was turned off by the “flatness” of the images and turned to film. But when I discovered pinhole I knew then I had found the answer to “what I want to be when I grow up” I feel amazingly fortunate to have found this “voice”.

[singlepic id=147 w=600]3, ©Diane Peterson 2015[/singlepic]
 

Get Inspired – An Abandoned Forest

Today’s featured pinhole photo brings a sense of how deep those still waters run

An Abandoned Forest
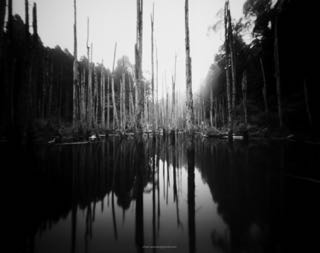
[singlepic id=161 w=600]An Abandoned Forest, 4×5 pinhole camera, TMAX 100, ©Chien Wenwei 2015[/singlepic]

Chien Wenwei made this moody capture in Nantou, Taiwan of a stand of trees that have been overtaken by the floodwaters; with the absolute stillness of the water adds to the feeling of abandonment.

More of Chien’s work can be found on Flickr or Facebook.


Changing Light: Managing the Long Exposures

Many of us who’ve been around photography for much time at all have been introduced to the concept of the Golden Hour – that time just after sunrise and just before sunset. The light during this time can be truly amazing, and has served as the drama of numerous photos over the years.

The challenge for us pinholers though, is that our cameras often require a longer exposure during these times of day. Moreover, as the exposure time increases, the intensity of the sunlight can change rapidly, leading to complexities in our exposure. The effect can be compounding, especially on slower capture methods such as paper negatives.

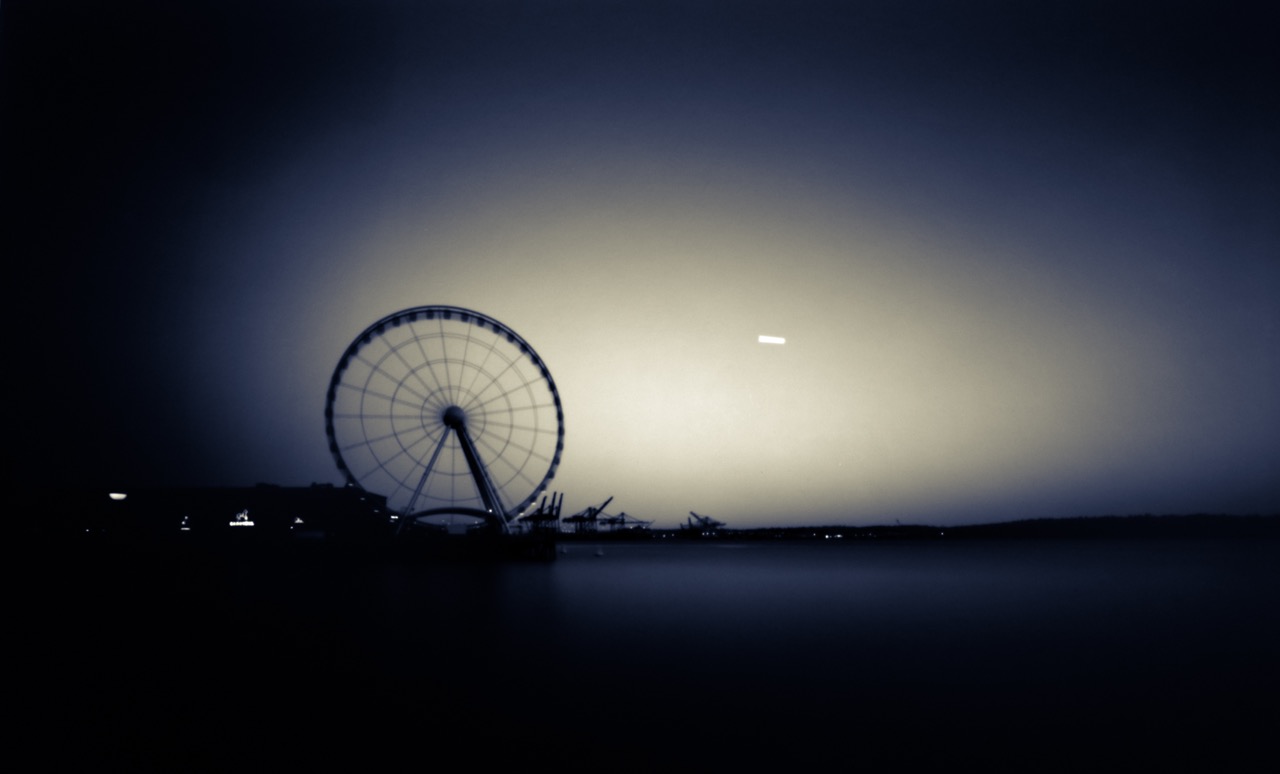
In my photo, Elliott Bay at Dusk, I had my Zero Image 4×5 loaded with a paper negative and pointed at a scene that originally metered at a 5 minute exposure. By the time I was done shooting, the scene was metering at 20 minutes. Overall I exposed for 15 minutes and got a result I’m quite happy with, albeit with quite a bit of nailbiting for that 15 minutes.

Elliott Bay at Dusk, ©Kier Selinsky 2015


For this article we want to learn a bit about working with the light during these challenging times of the day, and I decided to interview Eddie Erdmann for his insights. A quick look at Eddie’s Flickr profile shows that he’s quite adept at shooting pinholes during sunrise and sunset, and can speak with a bit of “been there, done that” authority on the matter.

Do you have a specific amount of time before sunset or after sunrise that you find works best? 
It varies. Sometimes the best part of a sunset occurs before the sun is down, and sometimes it occurs well after the sun has dropped below the horizon. If I have a particular location in mind for shooting the sunset, I will try to arrive 30 minutes to an hour before the sun goes down so I can watch and wait for the scene to unfold. In Alaska sunsets can last for a very long time in the summer, so when shooting a sunset here at that time of year, I may end up hanging out for a couple hours. When I’m in the Lower 48, particularly on the Gulf Coast, sunsets are fairly quick because the sun goes down at a much sharper angle. Sometimes I don’t even bother to take my cameras out of my bag because the sunset isn’t especially inspiring. When I’m shooting sunrises, I employ the same 30-minutes-to-an-hour approach. I find that the best moments occur from 30 minutes prior to 30 minutes after the sun rises.

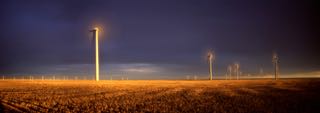
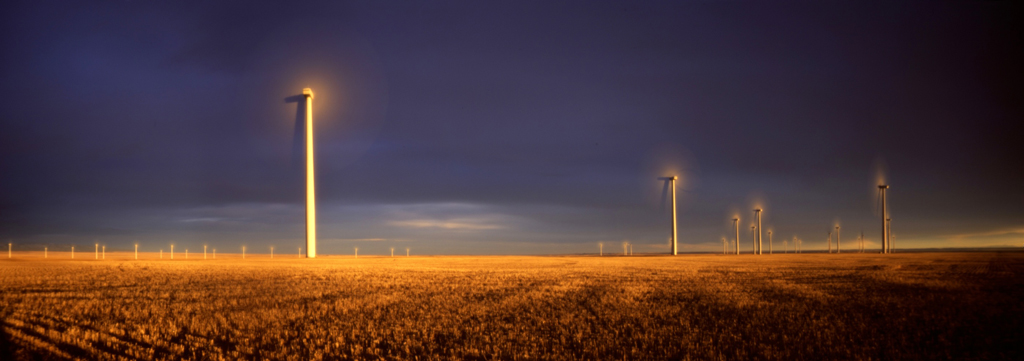
Eddie Erdmann - Judith Gap Wind Energy Center at Sunset
Judith Gap Wind Energy Center at Sunset, ©Eddie Erdmann 2015

How do you meter for a sunrise or sunset? 
I usually spot-meter an area of the scene that I estimate should fall within the middle range of brightness values and go with that exposure time. Usually I choose a cloud that isn’t catching the full rays of the sun. If I’m shooting with Fuji Velvia, I tend to spot-meter some of the brightest parts of the scene as well so as not to blow out the highlights too much. When shooting with Kodak Ektar or black-and-white film, I don’t worry so much about that.

Do you adjust your exposure time as the light changes? 
I usually decide on an exposure time before I open the shutter. I determine this time by metering, compensating for reciprocity if necessary and then tacking on a few extra seconds (or as much as a minute or more for longer exposures) to accommodate the diminishing light of the sunset (or subtracting a few seconds for a sunrise). I find that rough approximations do just fine when working with long exposure times.

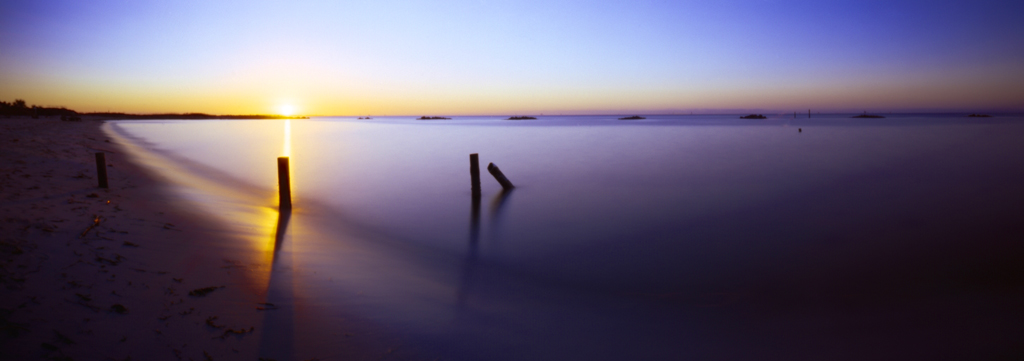
Eddie Erdmann - Pinhole Sunrise on Dauphin Island
Pinhole Sunrise on Dauphin Island, ©Eddie Erdmann 2015

Do you find that you need to adjust for reciprocity in the middle of an exposure?
If I determine that the scene will require an exposure time that will require me to take into consideration the film’s reciprocity characteristics, then I will do so, but I really don’t think about this once I’ve opened the shutter. I meter the scene, and if necessary I consult my film’s reciprocity data to decide how much I need to adjust the exposure. Then I open the shutter for the amount of time that I’ve determined would be best. A good thing about pinhole photography is that because the exposure times tend to be pretty long, you really don’t have to worry about being terribly exact. I don’t spend a lot of time calculating exposure times. Usually, it takes me only a few seconds to meter the scene, consult a reciprocity-failure chart (actually, at this point, I rarely look at charts–I use only a few different types of film, and I have a decent understanding of their reciprocity) and perform a simple calculation in my head.

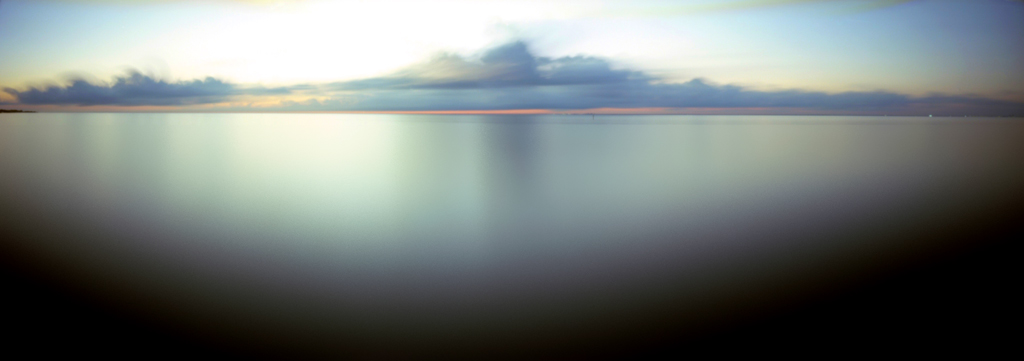
Eddie Erdmann - Mobile Bay Just After Sunset
Mobile Bay Just After Sunset, ©Eddie Erdmann 2015


We thank Eddie for taking some time out of his hectic schedule to help us capture the amazing light that exists at these times of the day. Hopefully some of this experienced input helps our readers to take advantage of the changing sunlight! Do you have additional questions? If so, put them in the comments and we’ll follow up with Eddie to respond back to you!


Get Inspired – Carrick 6

Take in the craggy harshness in today’s featured pinhole.

Carrick 6
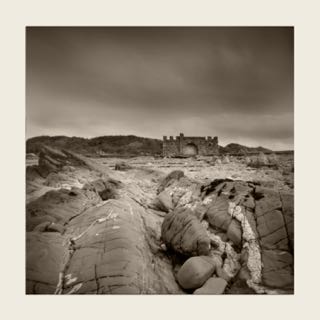
[singlepic id=143 w=600]Carrick 6, Zero Image 6×9, Ilford FP4, ©Dave Symonds 2015[/singlepic]

Dave Symonds photographed this harsh scene with his Zero Image 6×9 on Ilford FP4 film. The long tonality of this scene from Carrick Bay South West Scotland helps to really bring you into the vastness of what the harsh processes that brought this area to be.

You can find more of Dave’s work on Flickr and his personal site.


Get Inspired – Calatrava’s Bridge

Enjoy this convergence of lines for today’s featured pinhole photo.

Calatrava’s Bridge
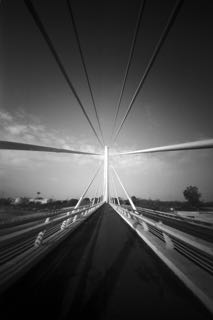
[singlepic id=142 w=600]Calatravas Bridge, ©François-Xavier Lantrua 2015[/singlepic]

François-Xavier Lantrua is a native of Hyères, France, where he enjoys making various high quality pinhole cameras. This photo expresses a wonderful perspective of the Alamillo bridge over Guadalquivir river in Seville, by architect Santiago Calatrava. François-Xavier used his custom multi-format for this photo.

You can find more of François-Xavier’s work on his Flickr page.


Get Inspired – Pinhole Closet View

Today’s featured pinhole image basks in some warm window light.

Pinhole Closet View
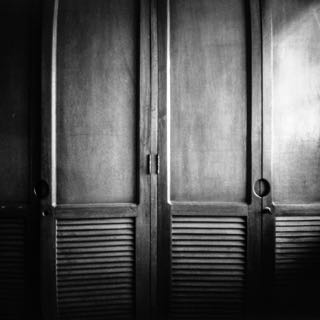
[singlepic id=141 w=600]Pinhole Closet View, Zero Image 6×6, TMAX 100, ©Tim Lowe 2015[/singlepic]

Tim Lowe is an American living in Colombia and, while well versed in photography in general, is relatively new to the world of pinhole photography. He made this image with his Zero Image 6×6, and is anxiously awaiting a 4×5 – the pinhole bug is a vicious one! Tim also works in alt process printing, especially cyanotype. He expressed some great seeing when he recognized this quiet scene!

You can find more of Tim’s work on 500px or Flickr.